iOS 7 introduced a variety of user interface improvements, one of which was the UISwitch control. This handy feature allows you to incorporate easy-to-use toggle switches into your app, enabling users to turn settings on and off with a simple swipe. In this tutorial, we’ll take a closer look at UISwitch controls in iOS 7 and walk you through how to integrate them seamlessly into your applications.
How to Use UISwitch in iOS 7
The switch control in iOS7 is employed to visualize the status of a Boolean object. To implement On/Off functionality, you utilize the UISwitch class. In this tutorial, we will learn how to modify the switch’s state using a button and how to present its current state.
To get started, follow these steps:
- Launch Xcode and initiate a new Single View Application project;
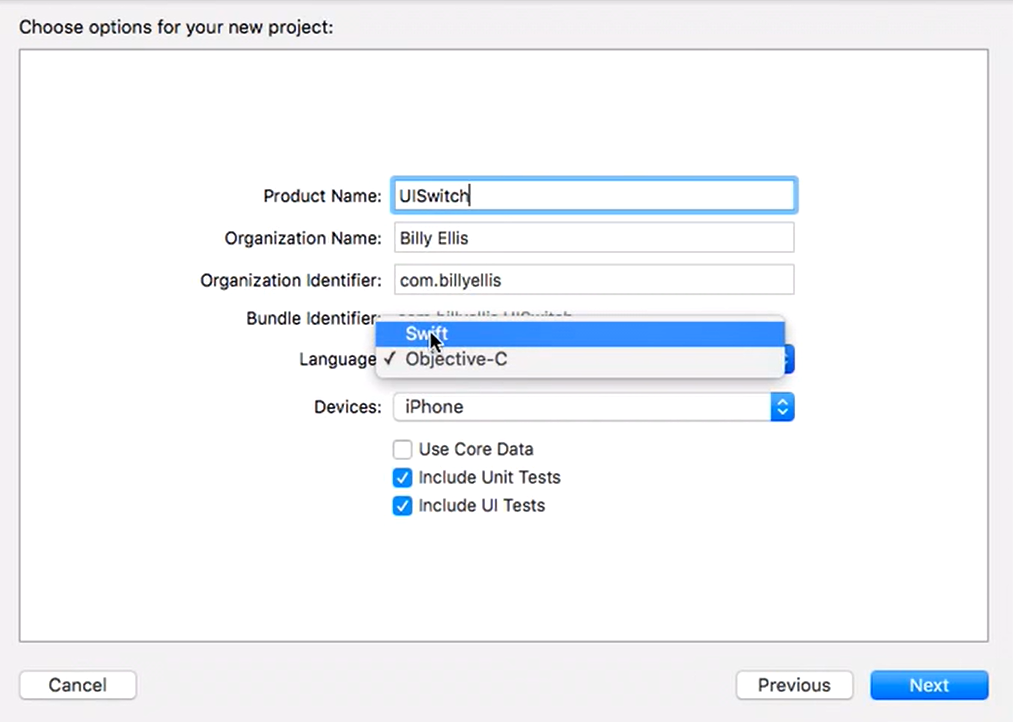
- For the product name, enter “iOS7UISwitchTutorial.”;
- Complete the Organization Name, Company Identifier, and Class Prefix fields with your preferred information;
- Ensure that only the “iPhone” option is selected under Devices;
- Navigate to the Storyboard and add a Button, a Text Field, and a Switch to the main view. Set the button’s title to “Change State” and the Text Field’s text to “The Switch is On.”;
- Now, activate the Assistant Editor and open the ViewController.m file. Create the following outlet by Control-dragging from the Text Field to the @interface section;
- Subsequently, create another outlet by Control-dragging from the Switch;
- Finally, create the following action by Control-dragging from the Button;
- Now, proceed to implement the buttonClicked method.
- (IBAction)buttonClicked:(UIButton *)sender {
    if ([self.mySwitch isOn]) {
        self.myTextField.text = @"The Switch is Off";
        NSLog(@"Switch is on");
        [self.mySwitch setOn:NO animated:YES];
    } else {
        self.myTextField.text = @"The Switch is On";
        [self.mySwitch setOn:YES animated:YES];
    }
}
If the switch is currently in the ‘On’ state, the Text Field’s text and switch state will be updated using the setOn:animated method of the UISwitch class. Conversely, if the switch is in the ‘Off’ state, it will be changed to the ‘On’ state. Naturally, ensuring that the Text Field’s text gets updated when toggling the switch, the viewDidLoad message is modified in the following way:
- (void)viewDidLoad
{
    [super viewDidLoad];

    [self.mySwitch addTarget:self
                      action:@selector(stateChanged:) forControlEvents:UIControlEventValueChanged];
}
When the switch is toggled, it triggers the `UIControlEventValueChanged` event, leading to the invocation of the `stateChanged` method.
- (void)stateChanged:(UISwitch *)switchState
{
    if ([switchState isOn]) {
        self.myTextField.text = @"The Switch is On";
    } else {
        self.myTextField.text = @"The Switch is Off";
    }
}
The Text Field’s content will dynamically change based on the switch’s state. After building and running the project, simply toggle the switch or press the button to observe the Text Field’s text updating accordingly.
You can access the source code for the iOS7UISwitchTutorial from the ioscreator repository on GitHub.
Conclusion
This article outlines the process of utilizing the switch control in iOS7 to visualize the status of a Boolean object using the UISwitch class. It provides step-by-step instructions on how to modify the switch’s state with a button and update the Text Field accordingly. The code snippet presented demonstrates the dynamic behavior of the switch, switching between “On” and “Off” states, and ensuring synchronization with the Text Field.
Adding categories in Objective-C is an excellent resource for expanding your knowledge of Objective-C programming. It provides valuable insights into user interface interaction and coding techniques that can be beneficial for your Objective-C projects.