iOS, Apple’s mobile operating system, provides developers with an array of versatile tools and user interface components to create intuitive and efficient applications. One such vital UI component, particularly for apps that involve scheduling, event planning, or just simply picking a date or time, is the iOS Date Picker.
What is the iOS Date Picker?
The iOS Date Picker is a graphical user interface element that allows users to pick a specific date, time, or both from a pre-defined set or range. It’s an integral part of the UIKit framework and provides a smooth, efficient, and iOS-native way to choose dates without manually typing them.
Key Features of the iOS Date Picker
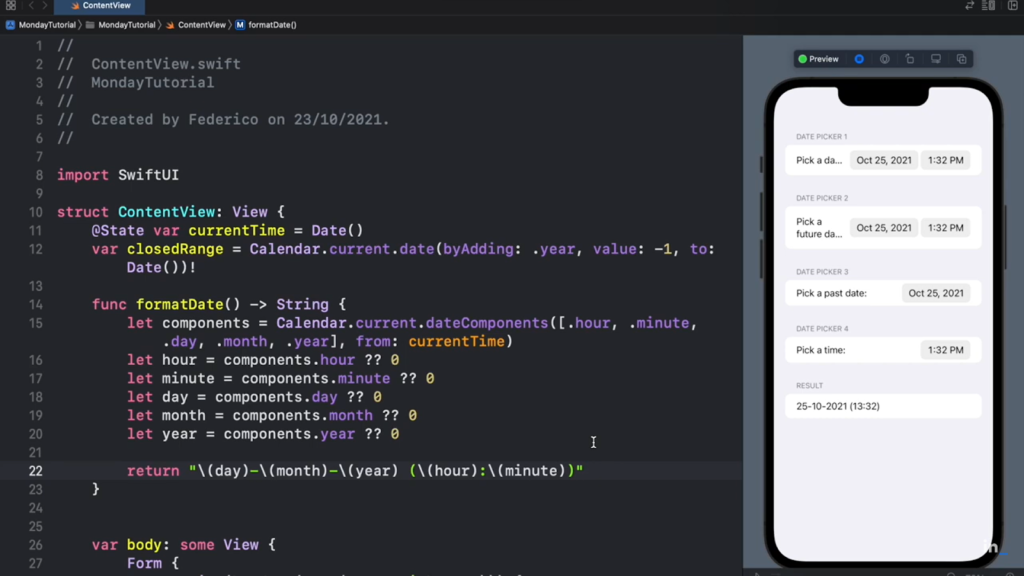
- Modes: The date picker offers multiple modes — Date, Time, Date & Time, and Countdown Timer. This allows developers to fine-tune the kind of input they want from users;
- Locale Support: It supports various locales, meaning it can display dates and times in formats that are familiar and appropriate for many regions and cultures;
- Integration with Calendar: The picker is automatically integrated with the iOS calendar, ensuring consistency with local holiday and week starting settings;
- Customizable Range: Developers can set minimum and maximum dates, which can be especially useful for apps that need age restrictions or particular timeframes;
- Dark Mode Compatible: With the introduction of Dark Mode in iOS 13, the date picker also adjusts its appearance to suit the selected theme.
How to Implement the iOS Date Picker?
The Date Picker offers a specialized Picker View, employing multiple spin wheels to enable users to pick dates and times. In this guide, we will display the chosen date within an onscreen label. This tutorial is crafted using Xcode 10 and tailored for iOS 12.
- Launch Xcode and initiate a new Single View App;
- For the product name, input “IOSDatePickerTutorial”, then provide your usual Organization Name and Organization Identifier. Select Swift for the language and click on ‘Next’.
Navigate to the Storyboard and add a Label to the primary View.
- Double-tap the Label to set its title as “MM/DD/YY HH:MM”;
- Then, position a Date Picker beneath the label;
- Click on the ‘Resolve Auto Layout Issues’ icon and choose ‘Reset to Suggested Constraints’;
- Open the Assistant Editor, ensuring that the ViewController.swift file is displayed;
- Ctrl-drag from the Label to the ViewController class to establish the subsequent Outlet;
- Similarly, Ctrl-drag from the Date Picker to the ViewController class to define the next Outlet;
- Lastly, Ctrl-drag from the Date Picker to the ViewController class to set up the corresponding Action.
Navigate to the ViewController.swift file and craft the `datePickerChanged` method:
@IBAction func datePickerChanged(_ sender: Any) {
    let dateFormatter = DateFormatter()

    dateFormatter.dateStyle = DateFormatter.Style.short
    dateFormatter.timeStyle = DateFormatter.Style.short

    let strDate = dateFormatter.string(from: datePicker.date)
    dateLabel.text = strDate
}- The `dateFormatter` configures the date in a concise style, presenting the date and time in the format MM/DD/YY HH:MM, which is then showcased on the `dateLabel`. The `string(from:)` function transforms the Date object into a String, which is then allocated to our label’s text attribute;
- Compile and execute the project. Upon altering the date, you’ll notice it reflecting on the screen;
- To access the complete source code for the IOSDatePickerTutorial, visit the ‘ioscreator’ repository on GitHub.
Conclusion
The iOS Date Picker is a testament to Apple’s commitment to providing developers with tools that are not just functional but also aesthetically pleasing and user-friendly. By understanding its features and best practices, developers can ensure they deliver a seamless and intuitive date and time selection experience to their app users. You may also like our tutorial on Swiftui background color, which offers insights into enhancing your app’s aesthetics while maintaining functionality.